I'm gettin the fall "itch" so I see lots of fall recipes coming up! We have a neighbor that regularly gives us fresh produce. Yesterday she dropped by with a bag of corn - she's been feeding us all summer! It has been wonderful! Last week she brought us some apples - clearly I HAD to make an apple pie! As I was putting everything together I remembered that my AWESOME little sister and her husband bought me some decorative pie dough cutters for Christmas last year - so I put them to good use! When my husband saw this pie he said "Awwww... this is ALMOST too pretty to eat!"
WHAT WILL I NEED?
2 ready made refrigerated pie crusts
6 medium sized apples
2 tbsp all purpose flour
2 tbsp lemon juice or lemonade
3/4 cup of sugar
Cinnamon and Nutmeg to taste
WHAT DO I DO NOW?
Peel and core the apples and then cut them into bite sized chunks, placing the chunks in a large bowl.
Add the sugar. Mix well.
Add the flour and the lemon juice or lemonade (I used lemonade). Mix well.
Add some cinnamon and nutmeg. Start with a tsp of cinnamon and a dash of nutmeg and add from there based on your own preference. Mix well.
Line a deep dish pie plate with one of the crusts. If you do not plan to line the outer edges with cutouts, then go ahead and fold the extra dough under itself and smoosh/pinch the edges with your fingers or a fork.
Pour in your apple mixture. (Sound like too much for you or you just don't have the time to peel, core and slice apples? Use 2 cans of Comstock Apple Pie Filling instead!! The filling is ready made so no need to add anything... except maybe some cinnamon and a little sprinkle of sugar - pour it into your pie shell and skip to the following steps)
If you would like to make a decorative crust, but do not have pie dough cutters just use some cookie cutters and place the cutouts all over the pie - leaving some spaces throughout for the apples to "breathe".
Bake the pie according to the pie crust packaging for a double crust pie. Bake for 20 minutes. Remove the pie and cover the edges with tin foil (so that the edges don't burn). Bake for another 20-25 minutes or until the apple mixture is bubbling and the crust in the middle of your pie is golden brown.
Cool and serve plain or with a scoop of vanilla ice cream!!
What will YOU scratch out of the box today?
Comments, questions or suggestions? Leave a comment below - or find Scratched Right Out of the Box on Facebook.
"Was that made from scratch? Yep, I scratched it right out of the box!" That was an ongoing joke between my older sister and my grandmother. I rarely make everything from scratch... so the title really fits. In this blog I hope to share some fun, yummy, EASY recipes with you. Using some boxed/ready made items and mixing them with fresh/"scratch" ingredients saves time, but still allows for your own creativity and a dish you can be proud of! Go forth and make something yummeeeee!!!
Showing posts with label Pie. Show all posts
Friday, September 2, 2011
Monday, August 15, 2011
BERRY Delicious... The Easiest Pie I've EVER made!
I think I've mentioned before that my husband LOVES fruity desserts. This pie is FULL of fruit!! I make this pie often for that very reason (and the fact that it is so easy). If he could, my husband would sit down and eat an entire pie - yep, he loves it THAT much. If you like berries - this recipe is for you - you'll love this pie!

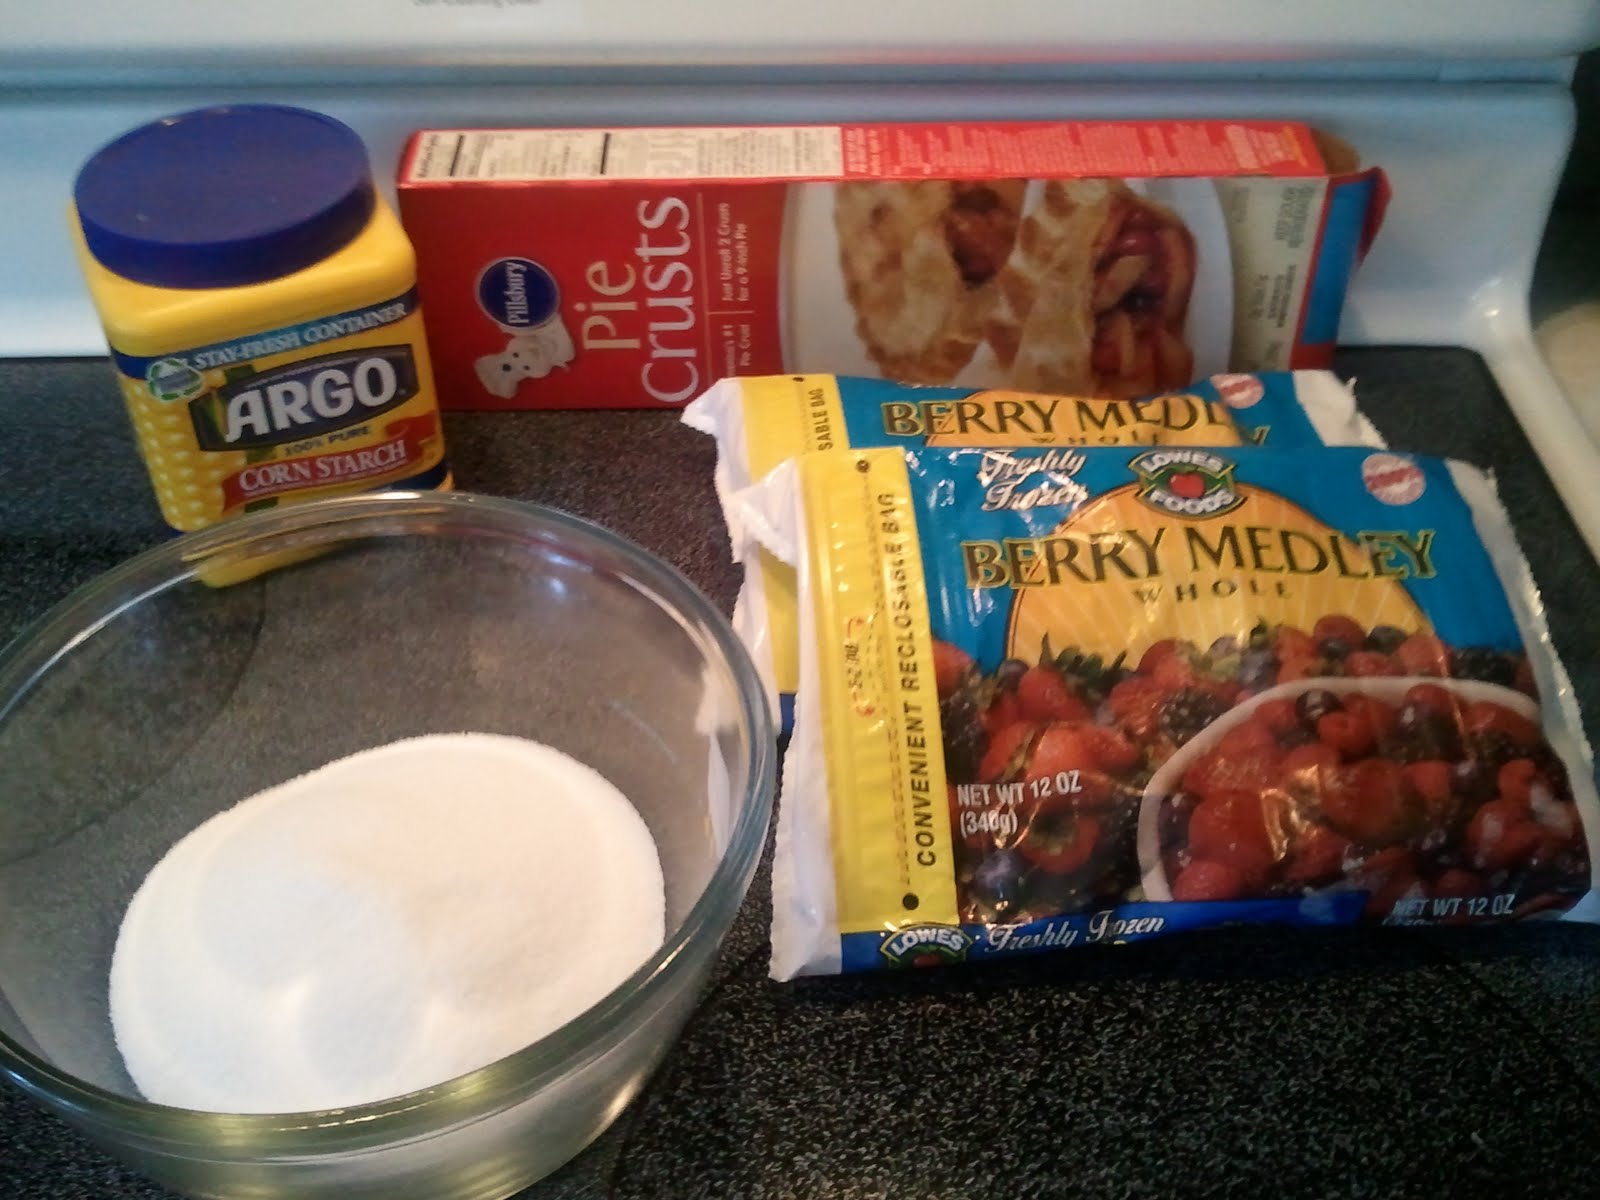
WHAT WILL I NEED:
1 pre-made refrigerated pie crust
2 packages of frozen mixed berries
4 tbsp of cornstarch
1 cup of sugar
WHAT DO I DO NOW?
Preheat your oven to 450 degrees. Roll out your pre-made pie crust into a pie plate. Tuck any extra dough at the edges under and press the edges of your pie shell with a fork or use your fingers to flute the edges. Bake for 10-12 minutes or until golden brown. Allow to cool completely.
Mix the sugar and the cornstarch together in a small bowl. Mix well and set aside.
In a sauce pan heat one package of the frozen berries over medium-high heat. As the berries start to thaw, "mush" (love that word) them with a fork so that you have mostly berry skins and juice (uh, yummy!). When you have "mushed" all of the berries and they are bubbling add the sugar/cornstarch mixture. Mix well. Remove from heat and add the second package of frozen berries as they are. Mix the berries well (no mushing this time). Add your berry mixture to the baked (and cooled) pie shell. Refrigerate for several hours to allow the berry mixture to thicken. Serve with whipped cream. Easy, cheap, delicious.
**For my calorie counting friends, reduce the sugar in this recipe to 1/2 a cup (still tastes great and you've saved a lot of cals!)** I do plan to have calorie counts up for my recipes soon... so stay tuned. =)
Have comments, questions or suggestions? Let me know by leaving a comment below!!

WHAT WILL I NEED:
1 pre-made refrigerated pie crust
2 packages of frozen mixed berries
4 tbsp of cornstarch
1 cup of sugar
WHAT DO I DO NOW?
Preheat your oven to 450 degrees. Roll out your pre-made pie crust into a pie plate. Tuck any extra dough at the edges under and press the edges of your pie shell with a fork or use your fingers to flute the edges. Bake for 10-12 minutes or until golden brown. Allow to cool completely.
Mix the sugar and the cornstarch together in a small bowl. Mix well and set aside.
In a sauce pan heat one package of the frozen berries over medium-high heat. As the berries start to thaw, "mush" (love that word) them with a fork so that you have mostly berry skins and juice (uh, yummy!). When you have "mushed" all of the berries and they are bubbling add the sugar/cornstarch mixture. Mix well. Remove from heat and add the second package of frozen berries as they are. Mix the berries well (no mushing this time). Add your berry mixture to the baked (and cooled) pie shell. Refrigerate for several hours to allow the berry mixture to thicken. Serve with whipped cream. Easy, cheap, delicious. **For my calorie counting friends, reduce the sugar in this recipe to 1/2 a cup (still tastes great and you've saved a lot of cals!)** I do plan to have calorie counts up for my recipes soon... so stay tuned. =)
Have comments, questions or suggestions? Let me know by leaving a comment below!!
Monday, August 1, 2011
Oh My, Pumpkin Pie - A Taste of Fall in the Summer!
Let me preface my first post by saying I was/am the cooking "runt" of my family. I have to try hard to learn from my cooking mistakes and follow directions to a "T". So, if I sound a bit "cooking for dummies" sometimes - that's because I, personally, need step-by-step instructions and I enjoy seeing photos of what everything should look like (so I know I am doing things correctly) - so I've done the same for you! With that being said... on to the post...
As everyone is dreaming of cooler weather, my husband and I have been craving a taste of the fall - pumpkin... specifically, a pumpkin/chocolate chip spice cake with cream cheese frosting that I typically make in the fall (I have to credit that idea to my sister-in-law). Oh yeah, my friends, it's delish!! However, for some reason, our grocery stores here are just now suffering from the pumpkin shortage of years past. There is no pumpkin to be found - anywhere! I have been on a pumpkin search for weeks! FOILED AGAIN! I did, however, find some pumpkin pie filling. So I improvised with a pumpkin, cream cheese and chocolate chip pie. Weeeeeeeee!
WHAT WILL I NEED?
1 can of pumpkin pie filling
1 5oz can of evaporated milk
2 eggs
4 oz of cream cheese (at room temperature)
3/4 cup of semi-sweet chocolate chips
1 prepared pie shell
NOW WHAT DO I DO?
Preheat your oven to 425 degrees. Line a deep dish pie plate with the pie shell, folding any excess at the top underneath itself and "smooshing" the edges. I use a fork. This doesn't have to look perfect. The filling will cover most of this.
Beat the eggs and the cream cheese together. Add the pumpkin pie filling and the evaporated milk. Mix well. I say "mix" here because trying to beat the filling and milk into the cream cheese and eggs is quite messy - so just mix it well with a spatula or spoon. Stir in the chocolate chips. Pour your mixture into the pie shell.
Bake at 425 for 15 mintues. Lower the oven temperature to 350 and bake for another 80-90 minutes.
Let the pie cool completely. Top with a scoop of ice cream or cool whip and get your eat on! Super easy and very yummy.
Go forth, humans, and make something yummy!!
Comments, questions, suggestions? Want me to try a recipe that you love? Let me know!
As everyone is dreaming of cooler weather, my husband and I have been craving a taste of the fall - pumpkin... specifically, a pumpkin/chocolate chip spice cake with cream cheese frosting that I typically make in the fall (I have to credit that idea to my sister-in-law). Oh yeah, my friends, it's delish!! However, for some reason, our grocery stores here are just now suffering from the pumpkin shortage of years past. There is no pumpkin to be found - anywhere! I have been on a pumpkin search for weeks! FOILED AGAIN! I did, however, find some pumpkin pie filling. So I improvised with a pumpkin, cream cheese and chocolate chip pie. Weeeeeeeee!
WHAT WILL I NEED?
1 can of pumpkin pie filling
1 5oz can of evaporated milk
2 eggs
4 oz of cream cheese (at room temperature)
3/4 cup of semi-sweet chocolate chips
1 prepared pie shell
NOW WHAT DO I DO?
Preheat your oven to 425 degrees. Line a deep dish pie plate with the pie shell, folding any excess at the top underneath itself and "smooshing" the edges. I use a fork. This doesn't have to look perfect. The filling will cover most of this.Beat the eggs and the cream cheese together. Add the pumpkin pie filling and the evaporated milk. Mix well. I say "mix" here because trying to beat the filling and milk into the cream cheese and eggs is quite messy - so just mix it well with a spatula or spoon. Stir in the chocolate chips. Pour your mixture into the pie shell.
Bake at 425 for 15 mintues. Lower the oven temperature to 350 and bake for another 80-90 minutes.
Let the pie cool completely. Top with a scoop of ice cream or cool whip and get your eat on! Super easy and very yummy.
![]() |
| The Finished Product |
Comments, questions, suggestions? Want me to try a recipe that you love? Let me know!
Subscribe to:
Posts (Atom)